Creating traditional neon is at least 10x more complex than making LED neon!
I’m going to take my commissioned work “Hang In There” for Vogue Singapore’s Artist In Residence project as an example of the meticulous work involved – let’s gooo!


- 💡Concept and design
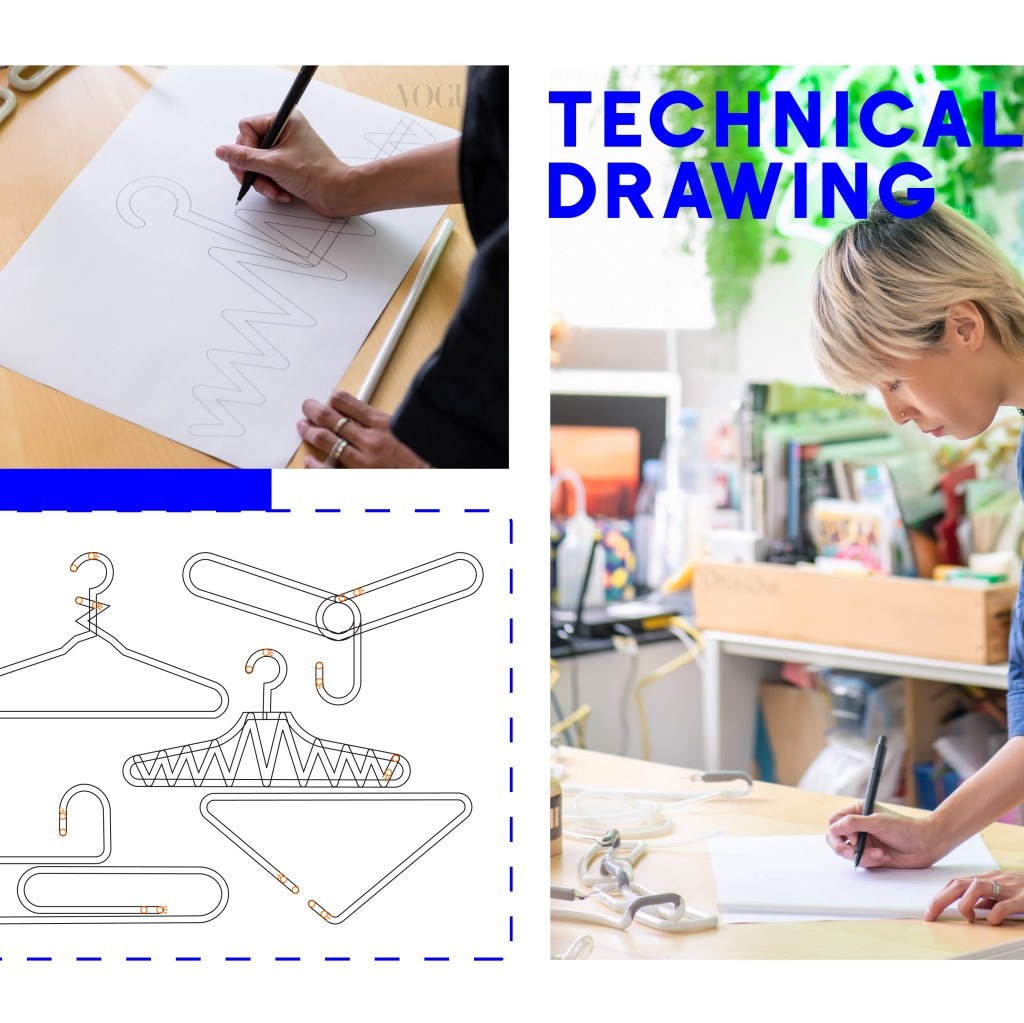
Beyond artistic vision, I have to balance aesthetics with technical feasibility. I started with freehand sketches and simple 2D/3D renderings to visualize how to bend the glass into one continuous shape.
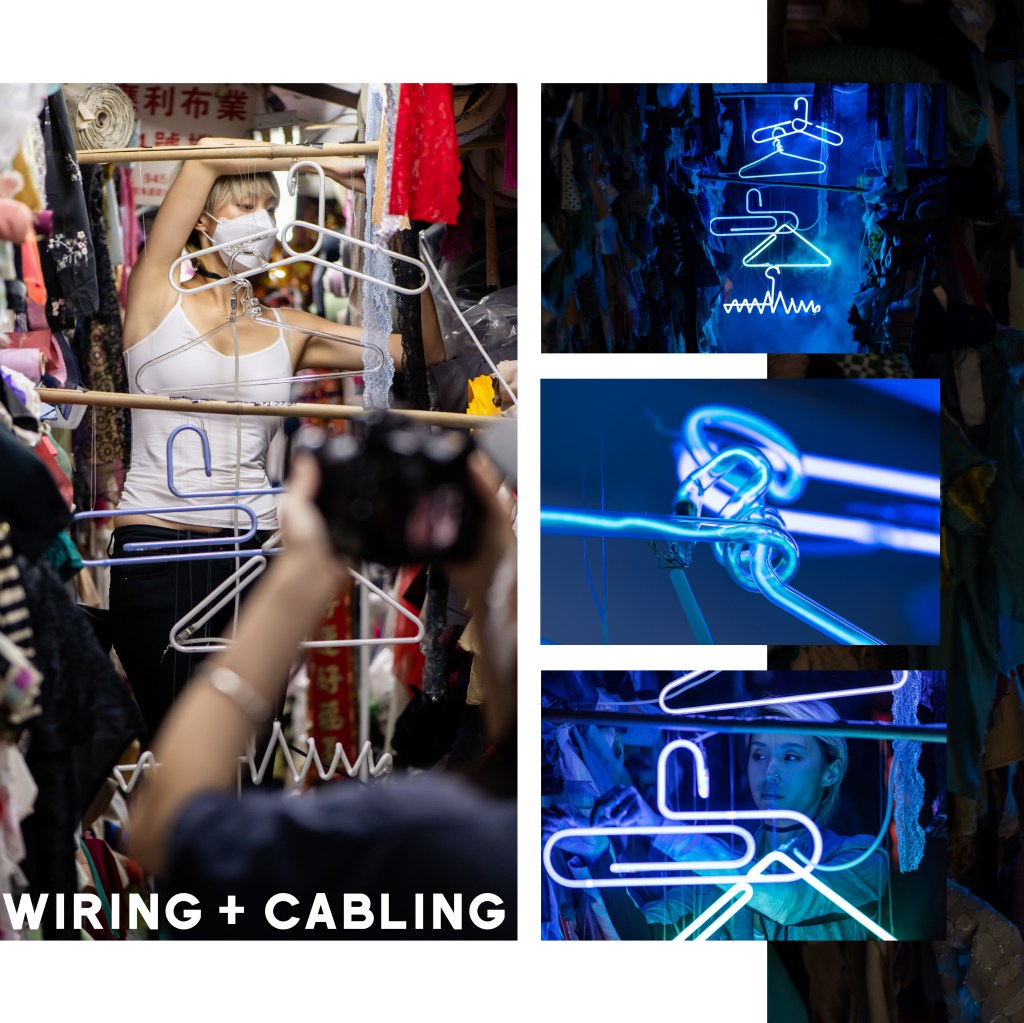
- I used hangers for the concept “Hang In There” based on the theme of “blue” as an emotion. One of the technical reasons I used hangers is the similarity in the production of a metal wire hanger and glass neon share. The metal wire bends its shape into the hanger in one piece, whereas glass neon needs to be bent with gas to run as one piece to light up as well.
- 📐 Technical drawings
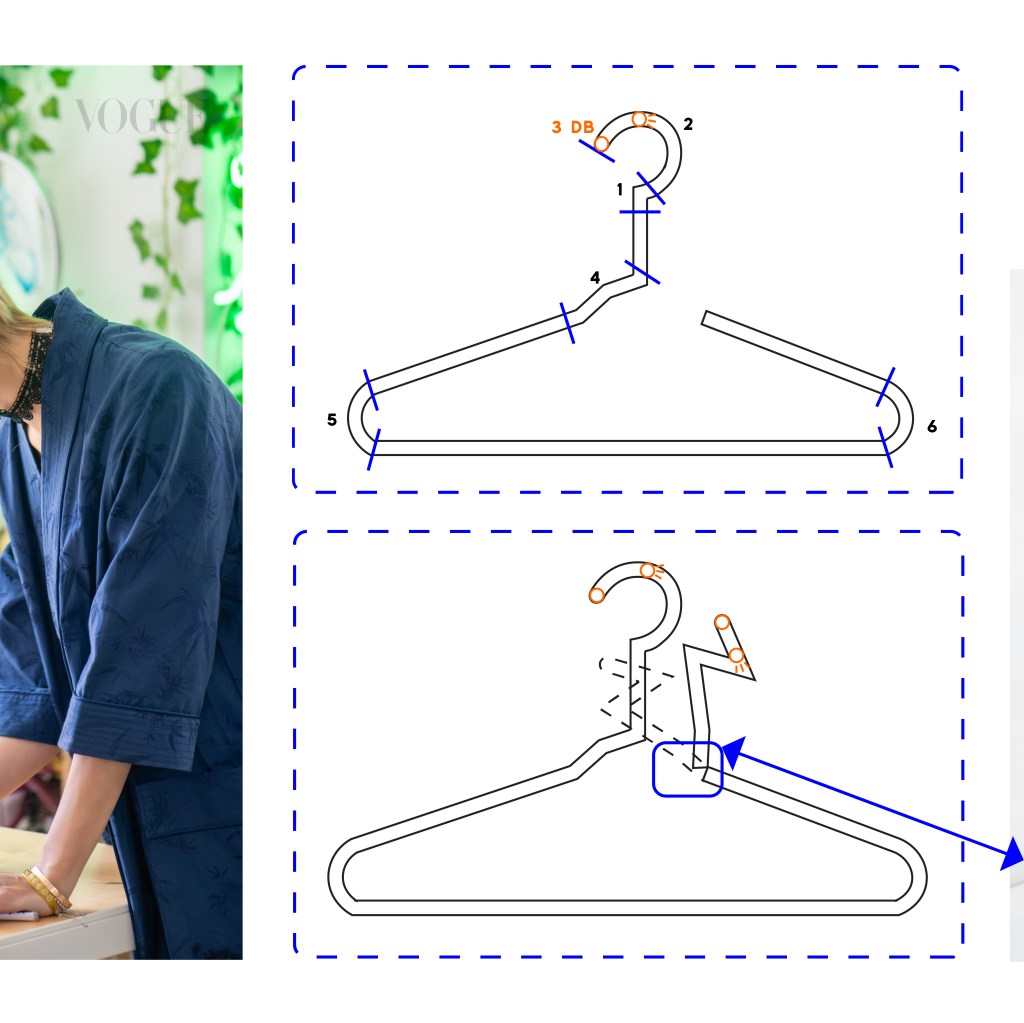
I created precise designs, flipping them to ISO standards for accurate bending and marking electrode placements, rises, drops, and bending sequences.
When I do neon bending, I press the bent tube to match the technical drawing pattern after each firing. Hence, I flip to reverse the design in the technical drawing, so that when I bend the tube following the design later, the front plane will be flat.
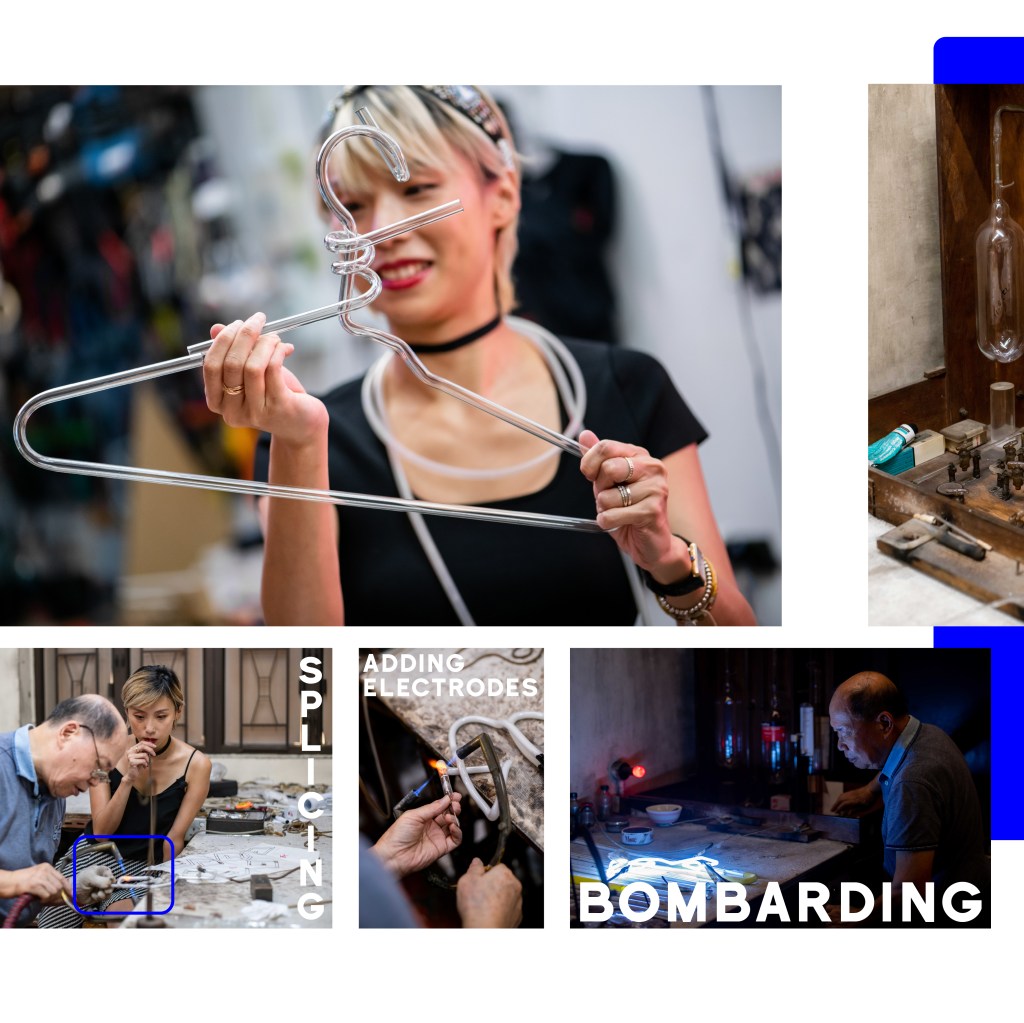
I also mark where and how will the electrodes go (circled in orange in the image carousel above) – in this case, they are hiding behind the tube in the backplane, sometimes they can be at a 90-degree angle perpendicular to the tube!
*I later learnt at Lycée Dorian that this “flipping method” follows the ISO technical drawing standard, which traces back to the Renaissance Da Vinci time! - Mark the rise and drop within the design
Literally means rising and dropping the tube.
Imagine doing a single-line drawing, even as simple as the alphabet “A” in one single-line. There are times when you need to run the pattern over right? It’s the same as neon bending, where we bend with a “line” of glass tube. A lot of times, we will have to do a U-bent/double-back bent when we run the pattern over. This also means that part of the neon glass will be lifted up, and will need to drop down at some point to continue with the pattern. - Mark the bending sequence
Take the double swirl hanger as an example, if I were to bend the hanger “chronologically” as I was drawing it freehand, I wouldn’t be able to “close” the hanger as the double swirl would be stuck.
I then split and bend the hanger into 2 separate parts, and weld them back to create the piece.
I will also need to calculate how long is the whole piece, to factor in the number of transformers and neon tubes to be used – this is important when I do commissioned works for clients as each piece would preferably not to be more than 2,5m lengths~

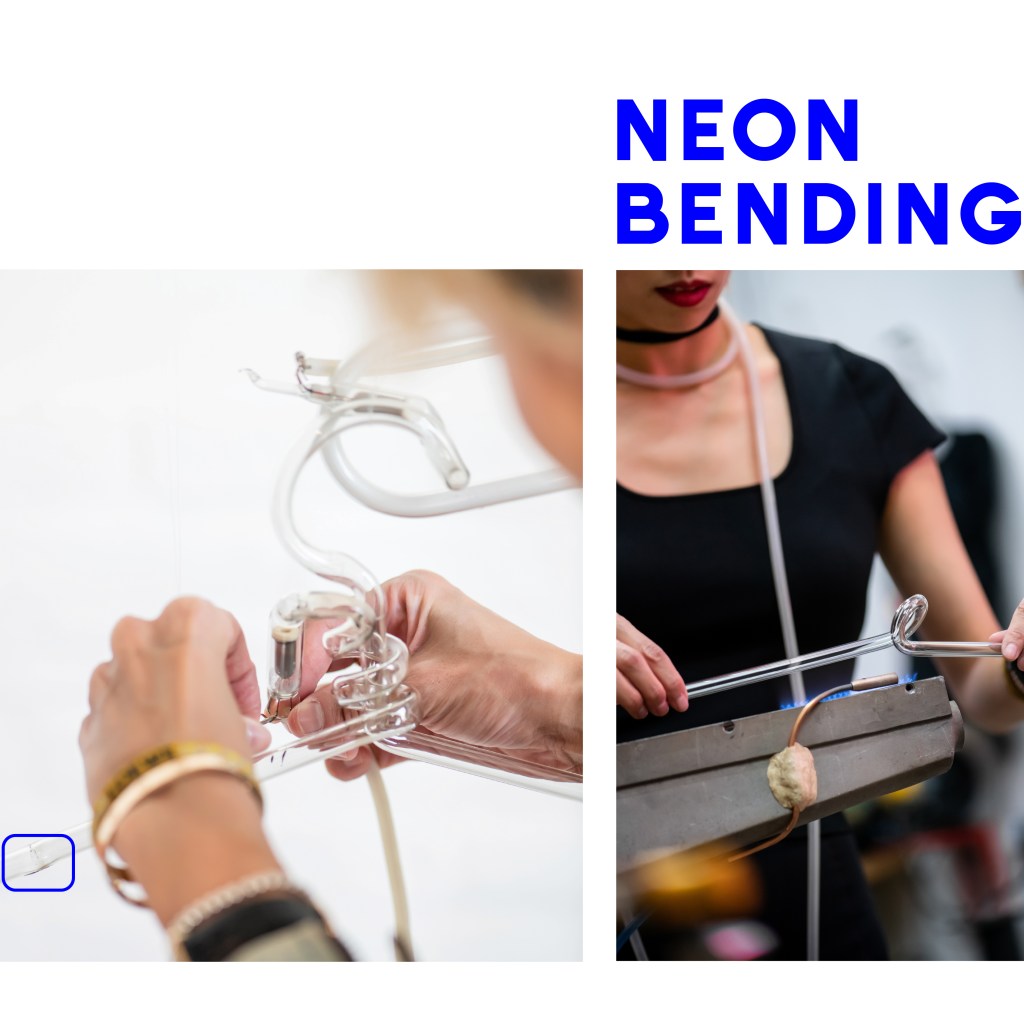
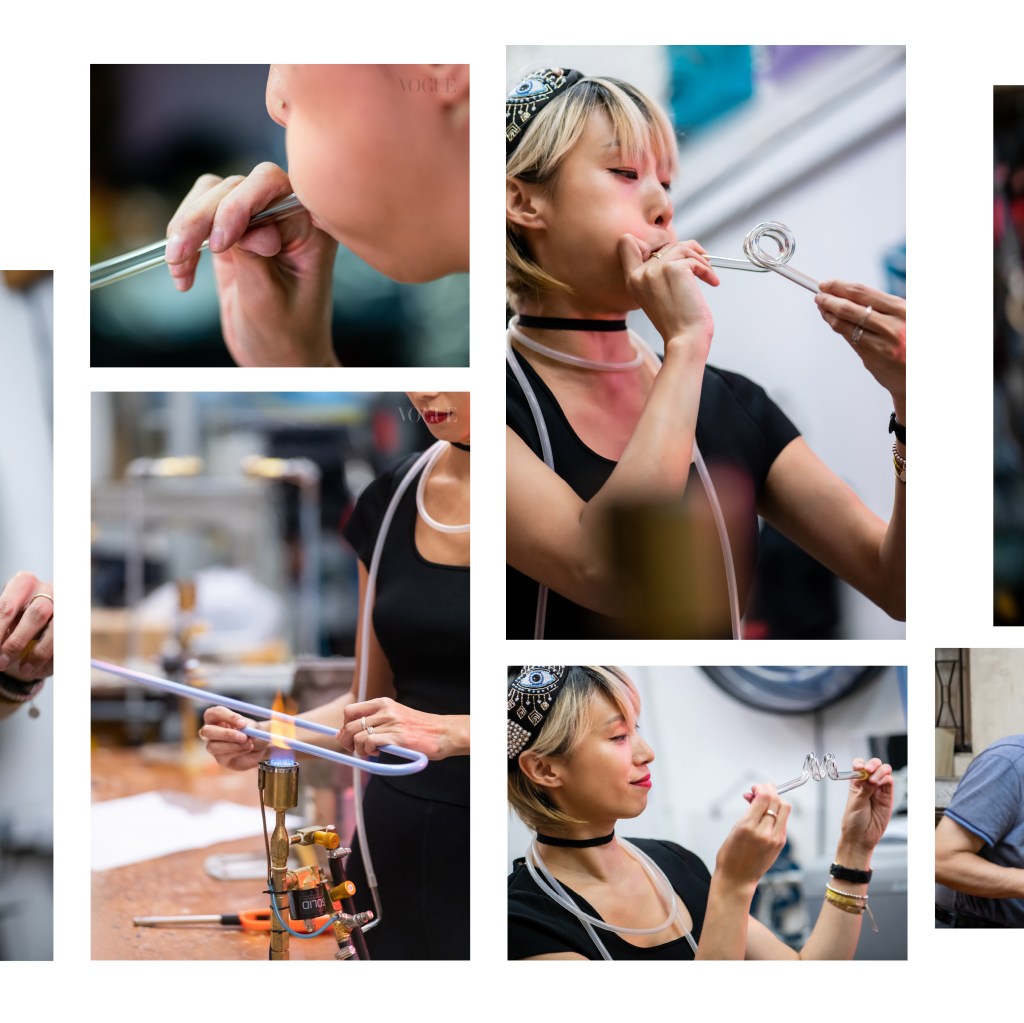
- 🔥 Neon Bending & Splicing
Using 2-3 torches, I bent the glass into shape and welded separate sections together, ensuring it aligned perfectly with the technical drawings. - Welding electrodes
They are attached to both ends of the tube and act as positive and negative poles for the electric current and to light up the neon.
*Fun fact: When I was working in “The Neon Girl” project, I have learnt that there are different electrodes invented in the world: French, American and Japanese!

- 💨 Bombarding
The glass tube was vacuumed at high heat to remove impurities. - Gas and mercury injection
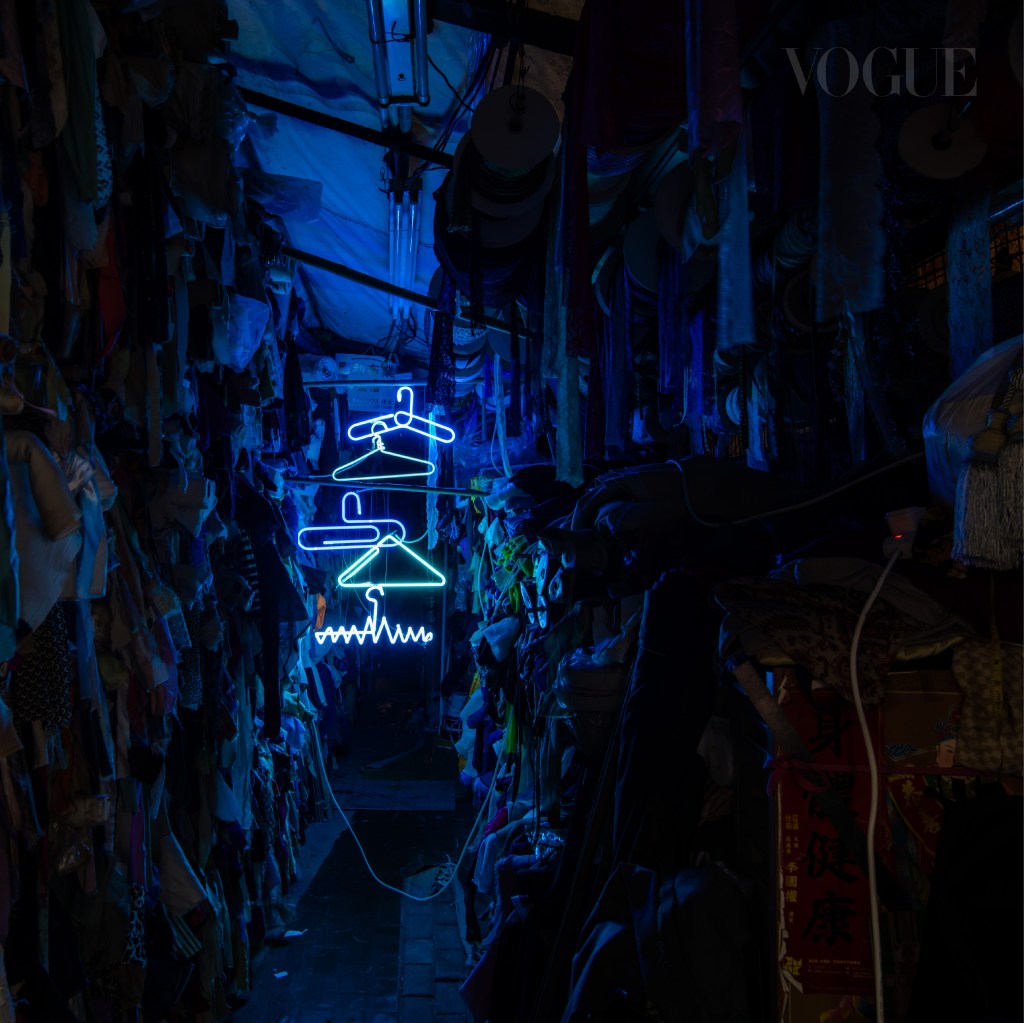
Depending on the colour I want, it defines which gas I will use. In the case of “Hang in There“, argon gas with mercury for the vivid blue glow!
In order to achieve various hues, the neon tube manufacturer may occasionally paint the interior of the glass tubing with UV-sensitive phosphors. The UV light produced by the mercury in the mixture causes the phosphors to shine.
Only small amounts of the gas are needed to make a neon sign. While the sign fixtures use high voltages, their power consumption is very low, in the milliwatts, making them energy-efficient.
*Fun fact: Neon gas is red and argon gas with a tiny drop of mercury gives us a blue colour!
*Another fun fact to break urban myths: The gases we use are noble gases – which means they are in the air that we breathe in already! So they are not toxic! The gas fill pressure represents roughly 1/100 of the pressure of the atmosphere. The required pressure depends on the gas used and the diameter of the tube, with optimal values ranging from 6 Torr (0.8 kPa) (for a long 20 mm tube filled with argon/mercury) to 27 Torr (3.6 kPa) (for a short 8 mm diameter tube filled with pure neon).


- 🎨 Blockage paint
The final step before installation is to apply paint to block unwanted light and installing the piece securely. - Installation
This is the part where most people might have forgotten.
A neon tube cannot stand alone itself!
It needs a supportive wall or system for display!
How it is being presented also matters a lot. Displaying it outdoors or indoors would mean the supportive system, cabling and power source must also be re-considered. Most of my work is installed directly on the wall, or supportive material like acrylic, mirror, etc.
For “Hang In There“, the challenge was its floating presentation in two temporary spaces. I used fishing wire, duct tape, and white tacks for a seamless effect!
These processes highlight why traditional neon is so much more complex than LED neon. Every bend, weld, and decision is deliberate, requiring careful planning from concept to installation.
Get new neon tricks, stories, and rare gas secrets by joining my newsletter below! 💙✨
Processing…
Success! You're on the list.
Whoops! There was an error and we couldn't process your subscription. Please reload the page and try again.
Some of the images above are outtakes from Kit Cheng for Vogue Singapore Artist In Residence shooting, and photos from “The Neon Girl” project with Master Wong.
